
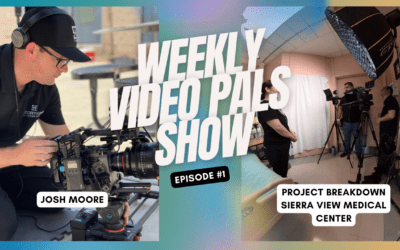
We gave ourselves one day to make a product video that looked like a national commercial. Just two guys, one day, one location. The clock is ticking. Here’s how we pulled it off and the tricks we used to make it look good. We were shooting a product video for a michelada mix, and this is what we did.
Why Pre-Production Was the Whole Game
If you’re familiar with our channel, you see we use the Sony FX3 a lot. And because this was such a fast-paced shoot, you might be surprised at our camera choice for this project. But the choice of camera we use is actually key to getting the shoot done quickly. Most high-end commercials have big budgets, lots of pre-production, lots of production, lots of post-production to make those commercials look good. We didn’t have any of that. We had me and Mike, and we had one day. So we had to use a powerful tool to make our project look as good as it could.
So with limited crew, limited time, limited budget, limited resources, what is the one trick you can use to pull off a project like this? Pre-production. As we went into pre-production on this project, we knew with the constraints we were working with, the choice in camera package was obvious. We were going to use the Ursa Cine LF 12K. That is the camera that was going to make or break this project because we needed maximum flexibility, maximum resolution, maximum frame rates, even though it is a big heavy cinema camera. It did bite us in the end, but we’ll get into that.
The image quality and flexibility that came from using the Ursa Cine 12K LF far outweighed the cons of working with a big heavy camera. That meant if we wanted to move the camera, we needed a dolly track. It meant we needed to keep the camera on the tripod or use some other system because this is not a camera that you handheld and do your cool little trendy whip pans with. This is a big heavy cinema camera.
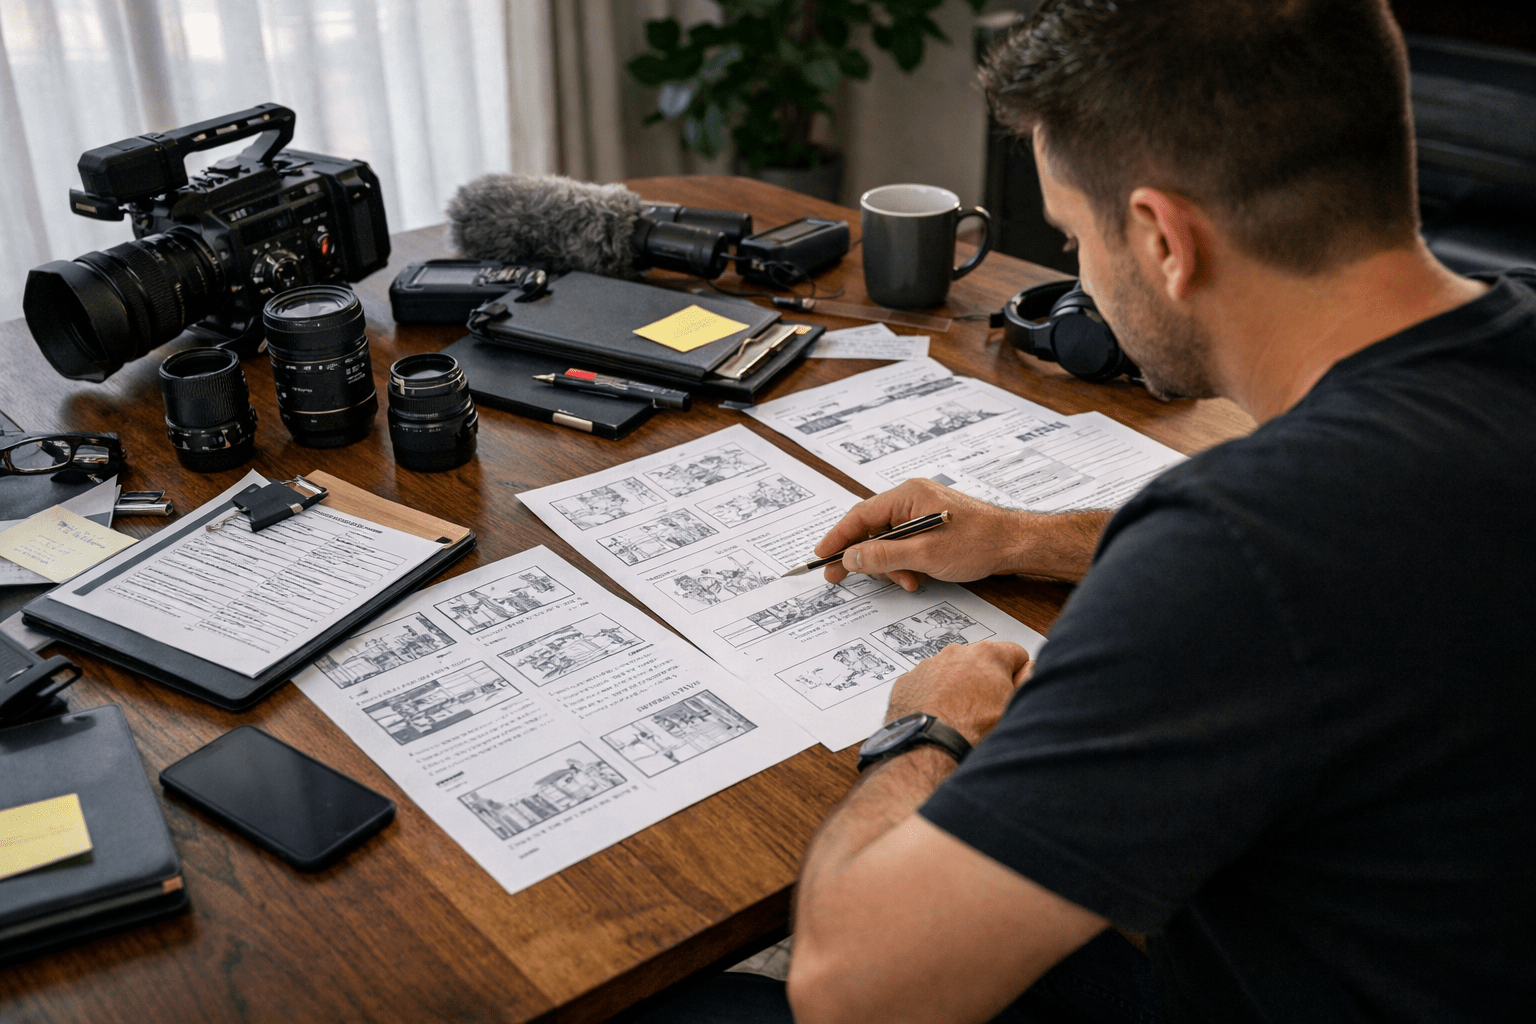
Storyboards, References, and the Backyard Location
When we got into pre-production, we knew we needed to storyboard this thing out. We knew because we had so little time, we needed to know what every frame was going to be, which also told us which props we needed to buy and what things we needed to prepare for to get this thing done. Halfway through the shoot, we realized we actually made a huge planning mistake, and that mistake just about ruined the look of the entire video.
As we were planning the shoot, we storyboarded every shot. We made sure we knew exactly what each shot was going to look like. We went through all of it and made sure we knew what piece of equipment was needed, what camera, what settings. That way, as we stepped through the day, we could just follow our list. It’s paint by numbers. Once you have that down, of course there’s always room for creative improvements and things on the day, but generally speaking, a shoot like this, the only way to get this done with the constraints we had, is with a very good plan. So we went about making the best plan that we could.
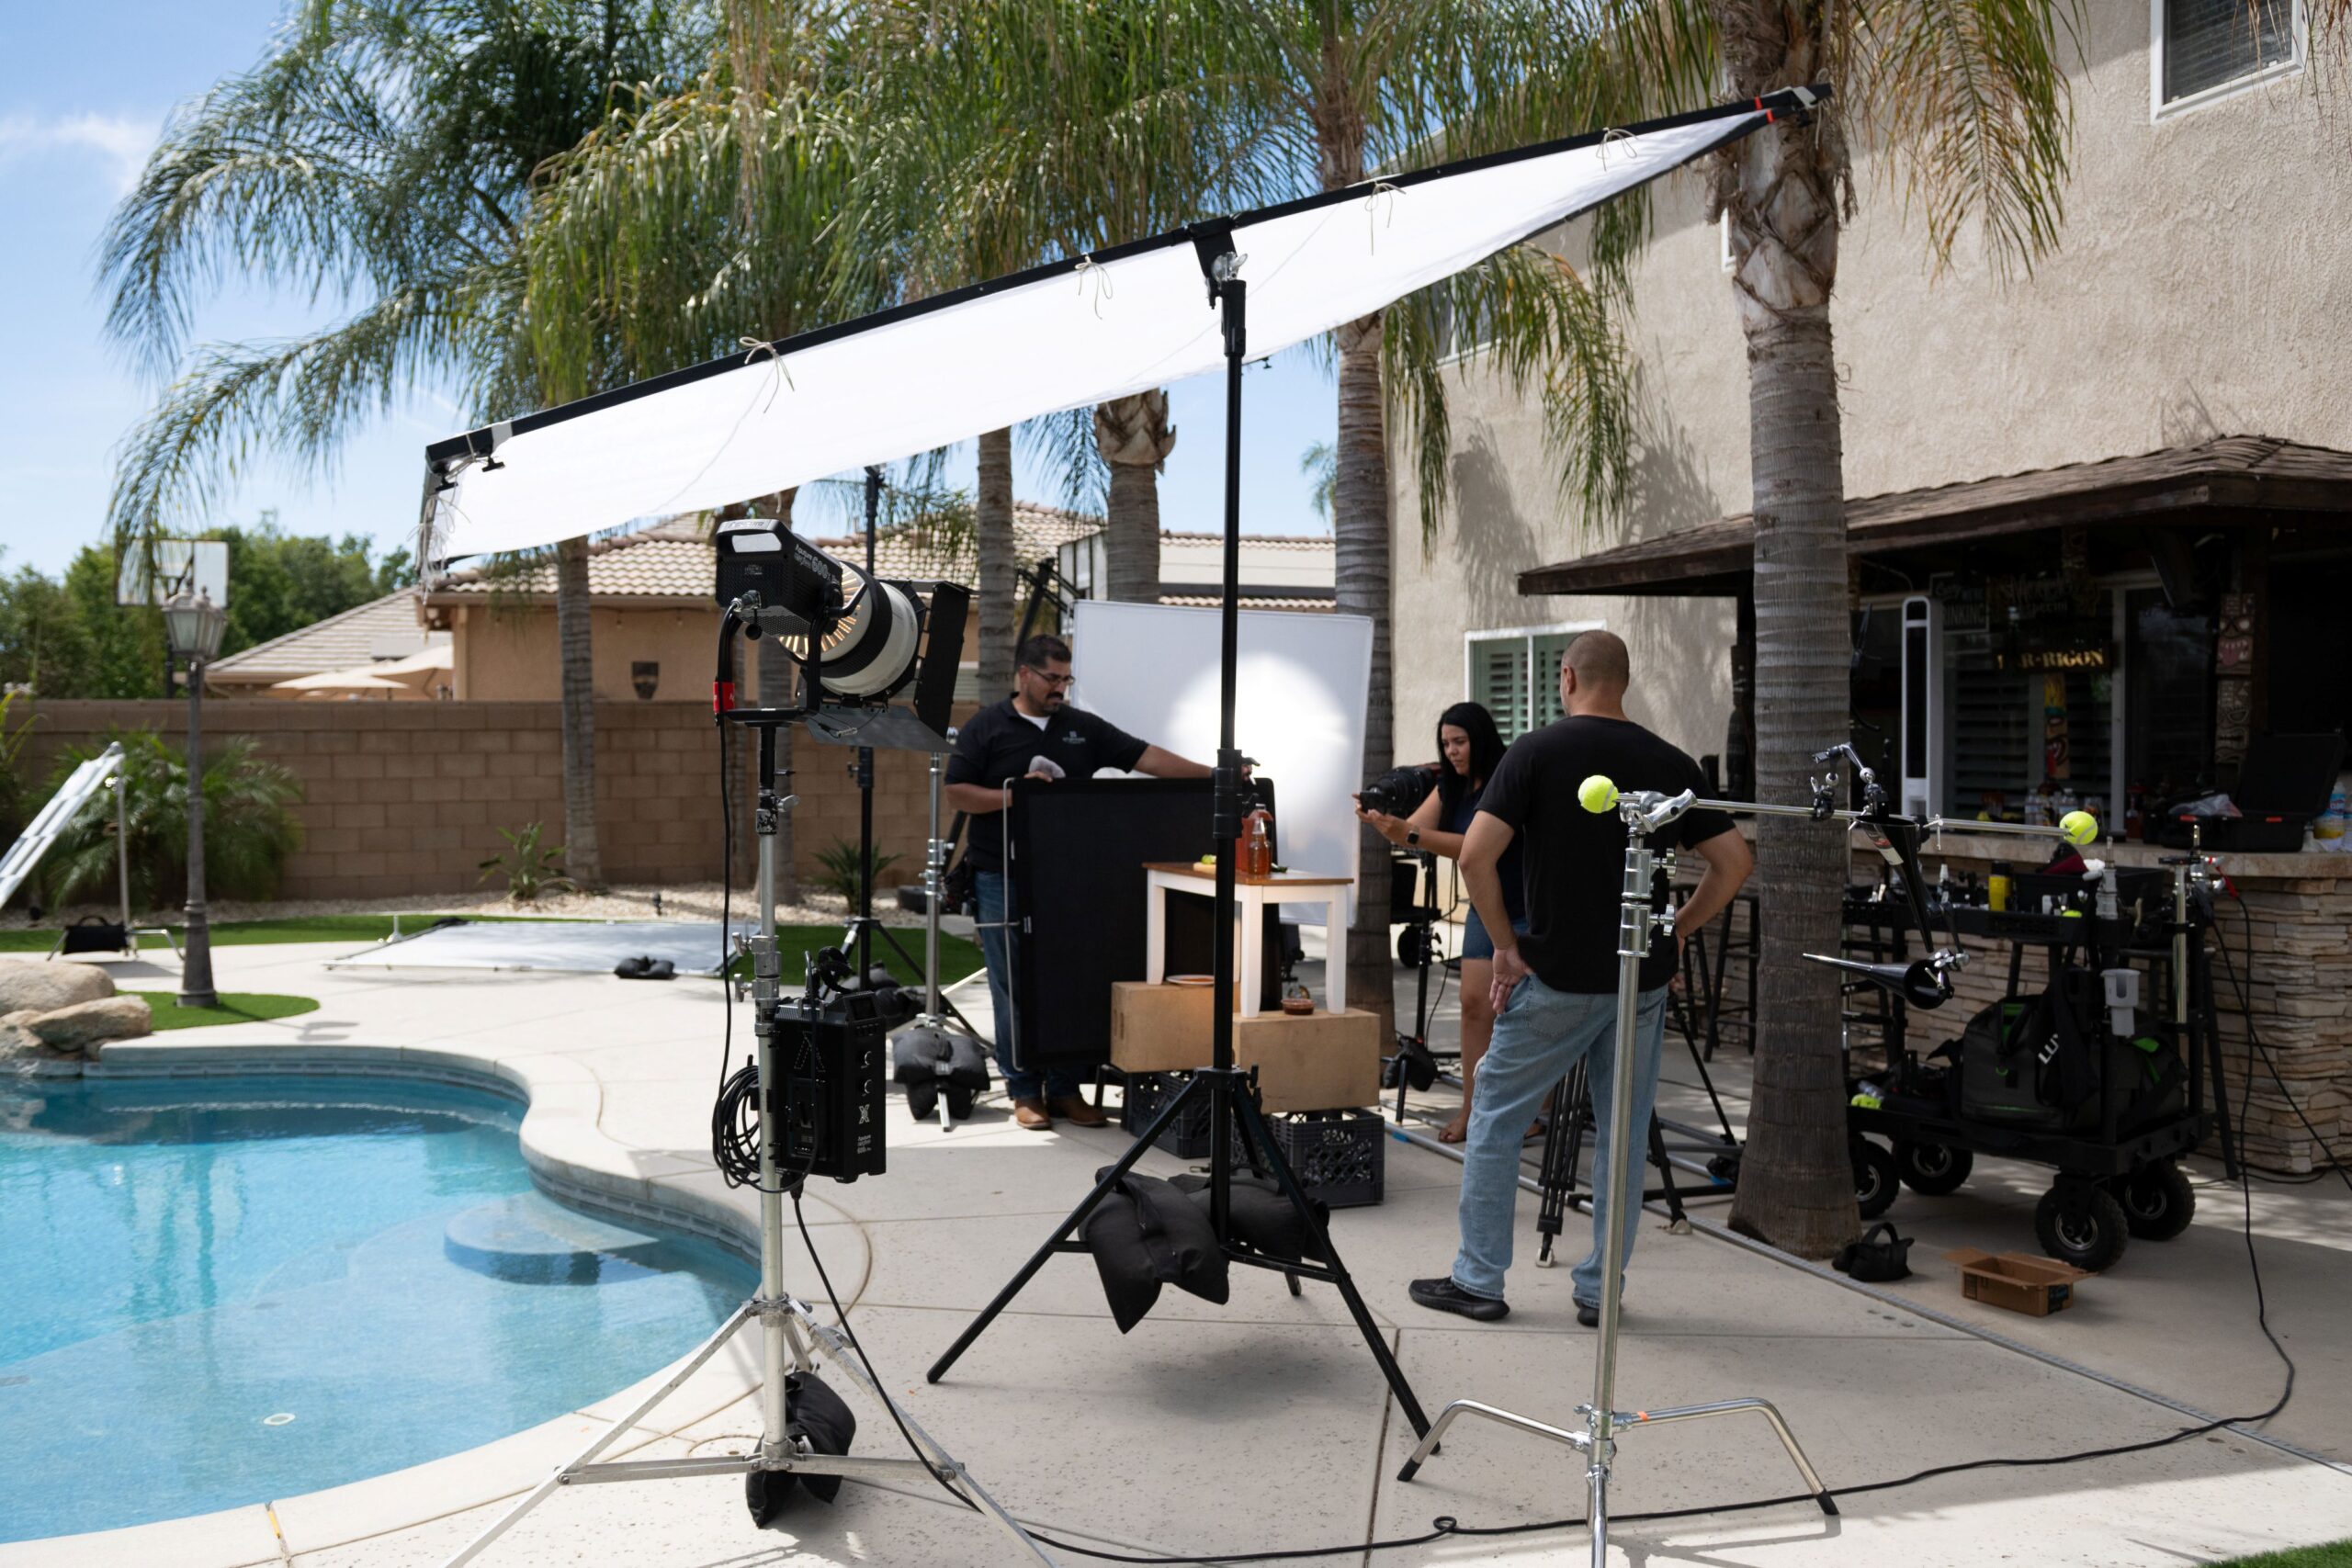
The location we had to work with for this was the client’s backyard. He had a beautiful backyard. The goal was to make this feel like a nice summer day, maybe by the pool, where you just want a nice beverage to drink. That’s what we went for. When we approach a commercial project like this, one of the first things we do is go look for references. We look for what other sorts of commercials have been made in this space for this type of client or industry or product, and we get ideas. A lot of times you find there are patterns to these commercials and ideas out there, and you realize there’s kind of a formula to go about these things.
You realize in many cases you don’t have to break the formula. You don’t have to break the mold. You can just work with the ideas that are already out there and make something great for your client because that’s all they’re really looking for at the end. In our case, we decided to reference frames from other similar commercials and use that to build out our storyboards for this project.
Planning the Sun and Building the Lighting Diagram
Another critical part of pre-production was deciding on the lighting and the lighting diagram and where’s the sun and the placement and all of these things because when you’re shooting outside, it’s actually even more important to control lighting because you have the sun, and when you’re shooting over the course of an entire day, that sun is going to move. It’s going to arc across the sky. It’s going to change. So we had to plan out the sun path. We had to decide where we were going to shoot, where we were going to position, and how we were going to create a consistent look over the course of shooting a day when we were crossing noon.
We figured out our approach to keeping that consistent, and so we put together a lighting diagram based on how we were going to set things up and what we were going to do. We ended up basically executing the diagram almost exactly as we had it planned. That’s perfect. There are a few modifications that you’re going to make on the day when you get there, and that’s great, but when you come in with a plan, it’s really easy to make those modifications rather than walking in and being like, “What are we going to do?” Definitely have a plan. Get your location scout images, whether you go there in person or just have the client send you some images. Get those references for your location. That way you know what is there, what the space is like, what you have to work with, and when you get there, you can make those choices.
So we got to set, we unload the van, we load in, and we’re scouting out our location for the first time. We didn’t actually get to go physically, and we realized that some of the layout of the space wasn’t ideal, and we had to work around things. We had some palm trees that were kind of in the way of where we wanted to be or put things or put a light. We were able to work around that and ultimately get a good look, and we were happy with it. Those scouting things are always helpful. We did not get a kind of 360 panorama sort of thing that we had asked for. They kind of showed us the area they wanted to shoot, which was great and good for planning, and we were able to go on Google Earth and kind of look at the background and get an idea of the layout and what issues might come up. We were right about those issues once we got there.
The Lighting Gear That Ended Up Being Critical
There’s one piece of lighting gear that we packed that didn’t seem like it would be important, but once we got on set, we realized it was critical to the look we wanted to achieve. Because we were shooting outdoors, we knew we had to deal with the sunlight all day. So we had to plan for the position of the sun and make sure we were going to work with the sun, not against it, because good luck with that.
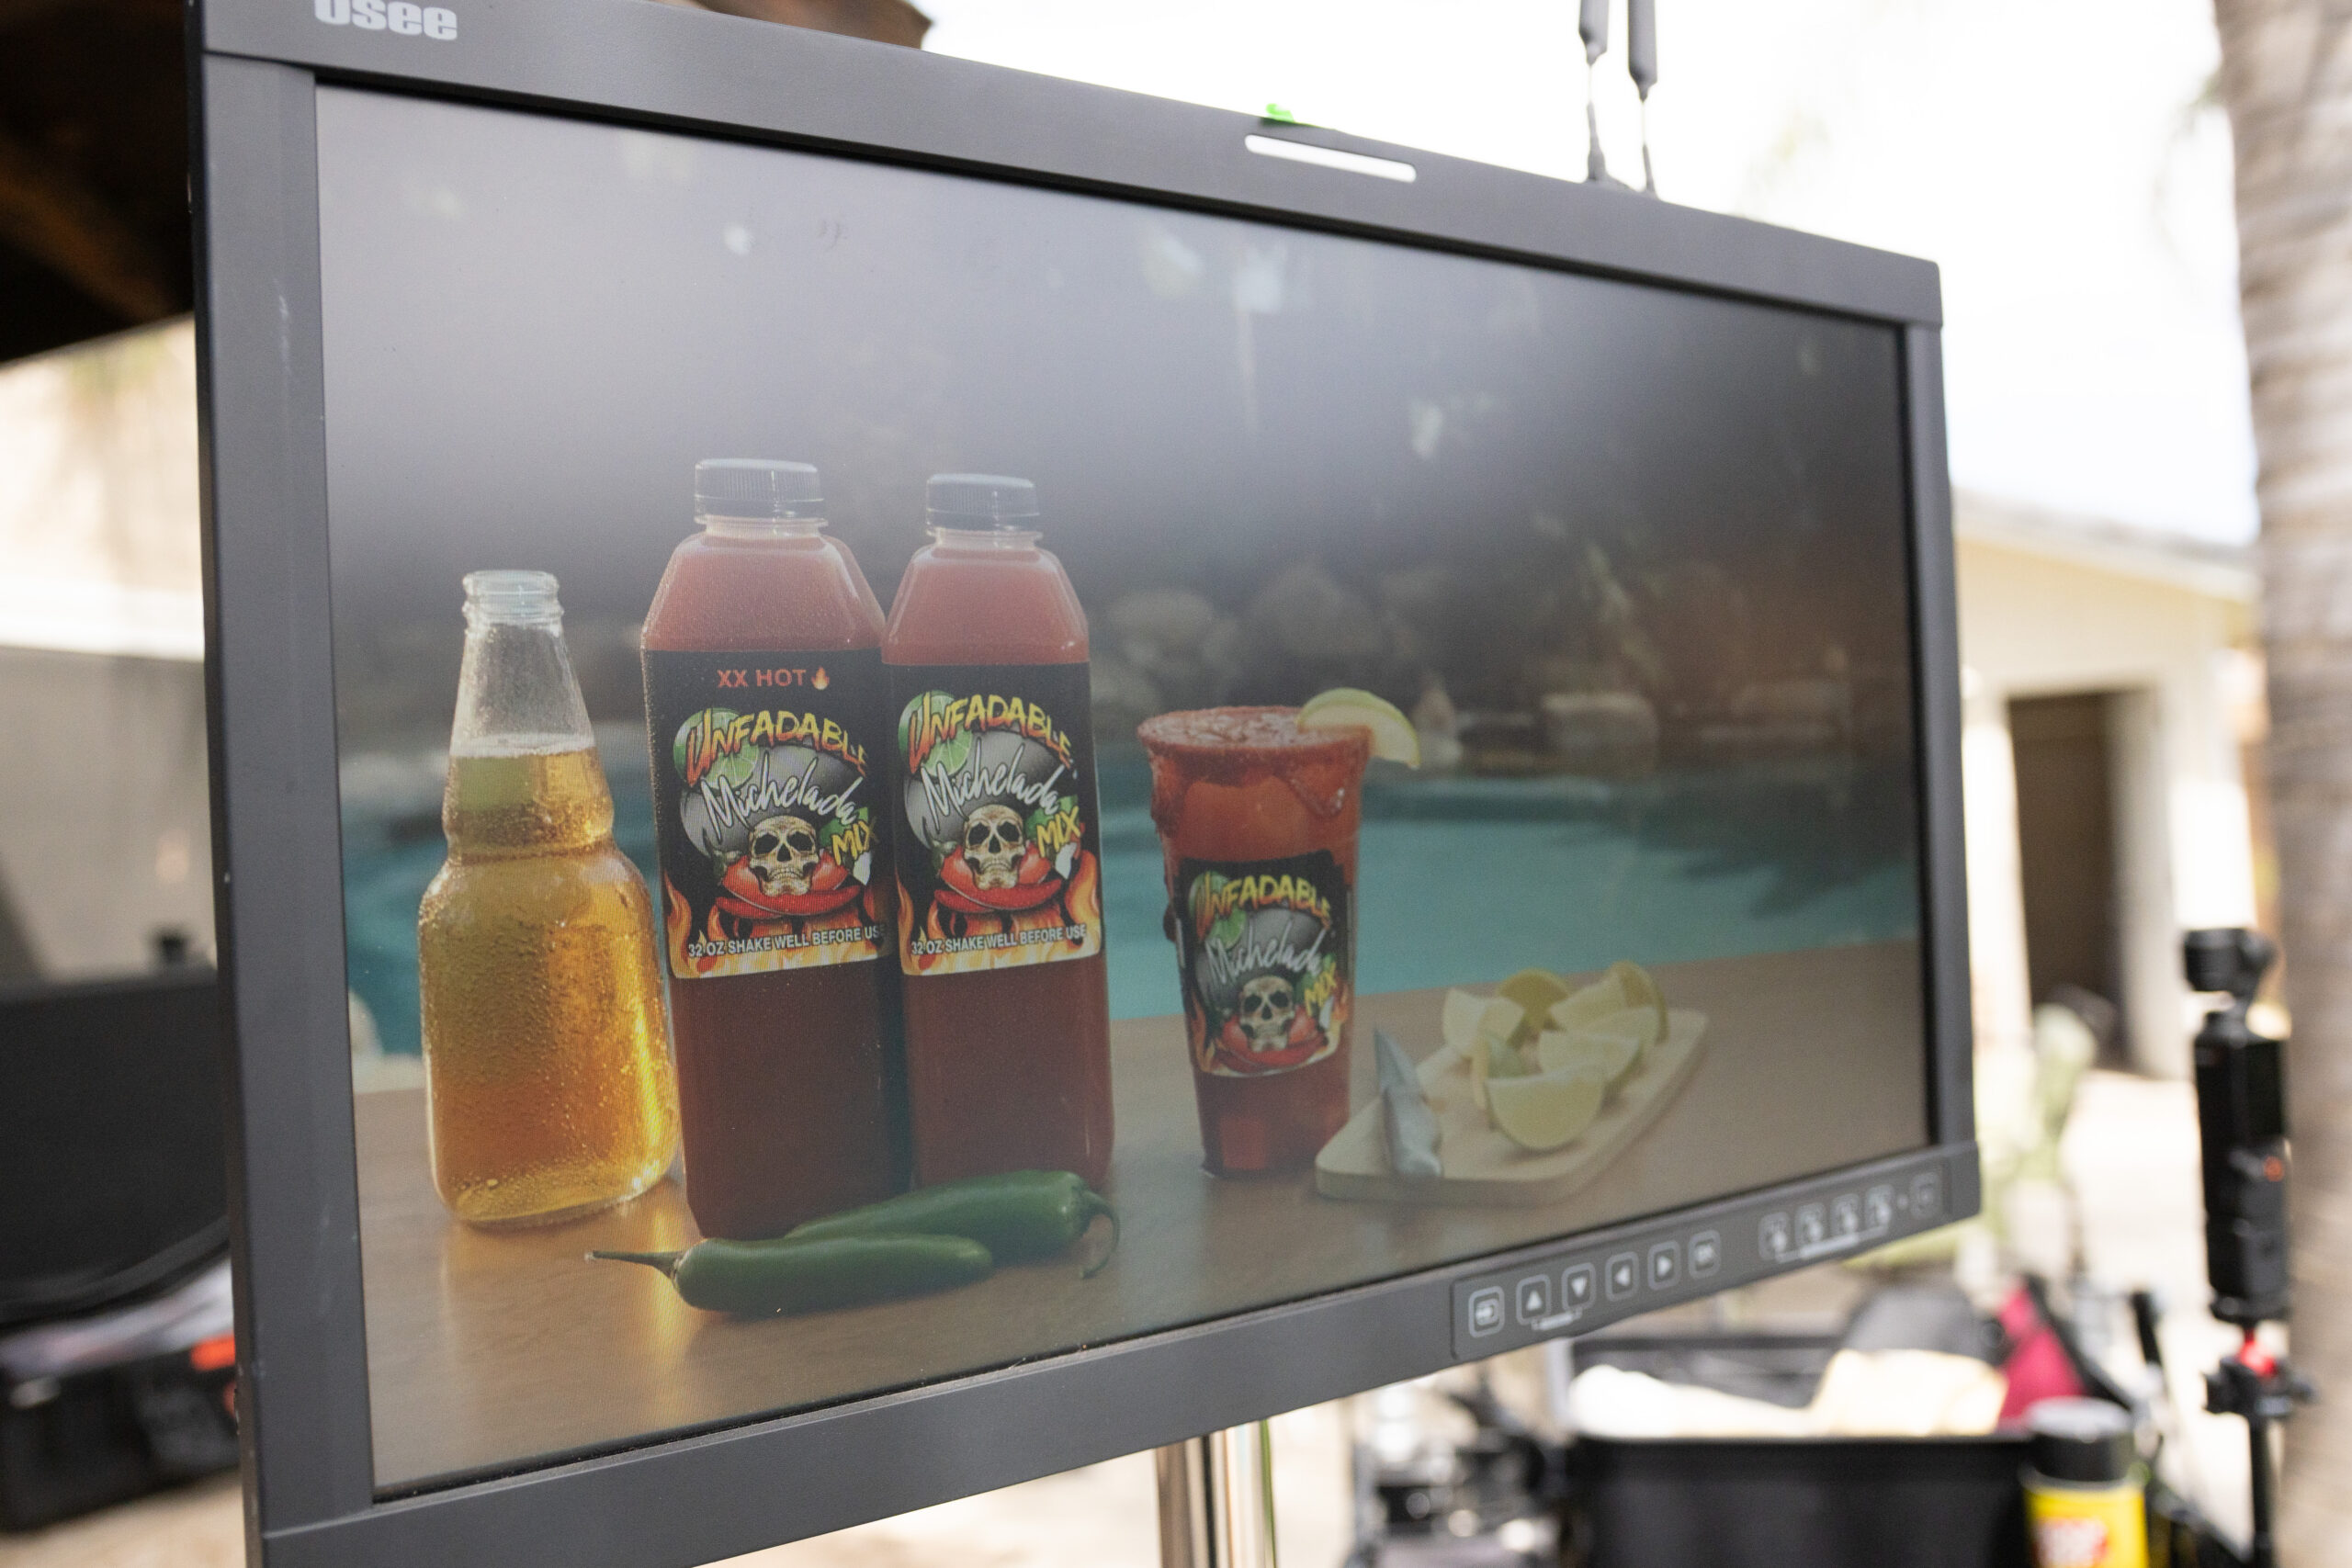
Any time you’re shooting products or food, there are industry standard tricks, and you can find a lot of these tricks online. We were able to use some of these tricks to help this shoot go way more smoothly than if we had tried to do certain things for real. We got our shot of the ice cubes falling. We had to spritz them heavily in glycerin, and then Mike just dropped them in front of the lens a couple times until we got it in focus, and we got it. It looks good. Feels like a million bucks.
In our lighting setup, you might notice that we not only have our key light punching through a silk, but we also have another light on a projector mount. That is the special piece of gear that didn’t seem important, but turned out to be killer. By using that projector mount to spotlight a very small beam of light exactly where we needed it, we were able to highlight pieces of the product. We were able to get the glint in the water drops. We were able to give that hard powerful glint that you need on product shots in addition to the big soft reflective source that you get from the key light going through a silk.
You need both that hard glint and the big soft source because if all you’re doing on your products is reflecting a tiny little hard light, you’re not going to get the look on the product you want. So you have to have that large source. But then you also need that little glint because that large source isn’t going to give you all of the glints that you need.
Food Styling Tricks, Glycerin, and the Fake Ice Mistake
Before I get carried away with all these things, we got everything set up, we were ready to shoot, everything looked beautiful, and then we had to stop the entire shoot because it was lunchtime. After some absolutely delicious tacos, we got back to work. Mike had a previous relationship with this client from when he used to have his own production company, so we decided that Mike would be the director and I would be the DP. You’ll see Mike is the one making a lot of creative decisions on this project, which is fun for me because all I have to do is make it look good.
Some of the food industry tricks that we used on the shoot were not only the lighting I mentioned, but also the plastic ice cubes, which I mentioned were a complete fail for us on this shoot. Another food industry trick is glycerin. Using glycerin to spray and spritz on things makes it look like it’s cold and there’s condensation. When you’re doing something like this on a hot day outside under hot lights, even if they’re LED, your product is going to melt. Your product is not going to look beautiful and cold and inviting all day. If you have real condensation from actual cold stuff, it’s going to drip. It’s going to pool up. It’s going to make a puddle and a mess, and you’re going to be cleaning that up all day and consistency is going to get ruined. So you use glycerin and you spray glycerin on your product to make those water droplets that look like condensation, which is what we did on this shoot, and it was fantastic.
There were a number of shots on this commercial, and as we went about filming each of them, we were checking off the storyboard as we went. We also had to think about the shoot order because there were certain things like we have to slice the limes and shoot the limes, or we have to shoot all the ice cubes falling before we get them dirty by putting them into the michelada mix. There’s choices and planning you have to do in pre-production to make your day of production productive.
We have the lighting diagram here. We planned to put a 12-by silk over the entire scene. We planned that we would have a side silk off to the side, light our product, and we knew which way the sun was coming from. We planned to put a bright bi-color 500 or 600 watt light at 3200 Kelvin to bring a nice sunset edge light. We also had our key light. We also had another light on the projector mount ready to just nail those little droplets and things on the shoot.
This leads me to our first planning mistake. We knew that when you’re shooting food, when you’re shooting beverages, you don’t use real ice because real ice melts. So you use plastic ice cubes. We had our plastic ice cubes. We were ready to roll. And when we started the first shot with the ice cubes, we dropped them in and realized they didn’t float. Then we had to stop and rethink everything about how we were going to shoot beverages for the rest of the shoot.
Now, this is a major pre-production mistake because we bought ice cubes. We did not test them. We didn’t know that they didn’t float. Always test your tricks before you get to set. Because our fake ice cubes didn’t float and didn’t look right in the glass, they sank to the bottom. We had to end up using real ice, and that led to inconsistencies in our product shots.
Finishing the Day and Catching the Detail That Pushed It Over the Top
As the sun was dropping, as the day was coming to a close and we were running out of time, we finally knew we had everything in the can that we needed. That was a great feeling to know that we had done according to plan. We had gone according to schedule because we had scheduled this whole thing out and we stayed pretty true to that schedule, which was fantastic. It was a successful day.
The hardest shot was rigging the clamps, getting the pour perfectly to go into that bottle, getting the streams of liquid just where we needed them, and getting the light hitting those streams of liquid just how we needed it. That projector mount came in so useful to just hit those streams. It wasn’t even water. It was ginger ale and michelada mix. But to get those streams exactly where we needed them, lit the way we needed, it looked great.
All of this goes to show you how much you can accomplish even with a small team, with a small timeline, with a small budget, even if you have a smaller amount of gear. But if you have proper pre-production, everything can still come together.
There’s one thing we caught while filming that made the whole thing look even better. Whenever we’re doing a commercial-style shoot where there’s a lot of setup and not as much footage, I like to really scrutinize the frame. Before we record, before we say we’re ready, I like to look at everything and say, “Okay, let me stare at this for a second. What do we need to do to take this over the top?” And I noticed the water in the pool wasn’t moving. So we stirred the pool water, and that little bit of motion with the little highlights and the little bokeh moving subtly in the background took it right over the top and said, “Now this looks fantastic.”
The commercial’s not finished yet, but I’m going to show you just the ungraded rough cut. We’ve not done color, we’ve not done noise reduction, we’ve not done any of those things that need to happen. All we’ve done is slapped a LUT on this so you can see how a project like this comes together straight out of camera.
What Worked, What Still Needs Post, and the Real Takeaways
There is still post-production work to be done on this. This is just a rough cut. We’ve got to tighten up the edit. We’ve got to do color grading. We’ve got to do noise reduction. We’ve got to do all that good stuff. So this is not done by any stretch, but you can see what the rough cut straight out of camera looks like. You can also see how choosing to use the Ursa really saved the day on this project because even though it looks pretty good out of camera, the fact that we have so much flexibility in color grading with the RAW to really push and pull and put accents on things we want and tone down things we don’t want is going to make the color pop and make everything look totally sick on this thing.
I’m so glad we shot it on the Ursa. I’m so glad that we were able to do the pre-production to make this project come together. We still have some work ahead of us to get this project done and over the finish line, but I’m excited with what we got just looking at it straight out of camera.
This shoot was a super fun challenge for ourselves to see how far we could push it. All the client wanted was his simple how-to video that we also shot, and we saw the opportunity to turn this into something bigger. So we pitched him on doing this commercial shoot all day in his backyard, and he said yes. We got to come in, play with lights, try things out that we hadn’t had a chance to really try. It’s always important to flex those muscles and give yourselves a challenge like this.
Key Takeaways
- Pre-production leads to efficiency, quality, and better results because you make mistakes before set, not on set.
- A small team can make a big video if you think through how to maximize the resources you have.
- Tiny details make a big difference, from glycerin droplets to stirring the pool water to add life to the frame.
About StoryKing Studios
StoryKing Studios is a Bakersfield video production company creating commercial, branded, and story-driven video work for businesses that want content with a polished look and a clear purpose. To see more of how Josh and the team approach projects like this, take a look at the portfolio.

0 Comments